
You love garlic bread but your oven is busy or you’re in a tiny kitchen. Making garlic bread without an oven is fast, simple, and gives a perfectly crispy result using a stovetop skillet. You’ll get a crunchy exterior, soft center, and garlicky butter in about 20 minutes.
The secret is a hot pan, a thin garlic butter, and a steady hand flipping slices. If you don’t already own one, a 10-inch cast iron skillet or a non-stick sauté pan makes this predictable and repeatable. A silicone pastry brush helps get the butter evenly on every slice.
Read on and you’ll learn how to prep, cook, crisp, and store garlic bread without an oven. This guide includes timings, easy swaps, and small kitchen fixes so you’ll pin it for your next weeknight meal.
Preparing Your Ingredients for Garlic Bread Without an Oven (Easy, 30-minute)
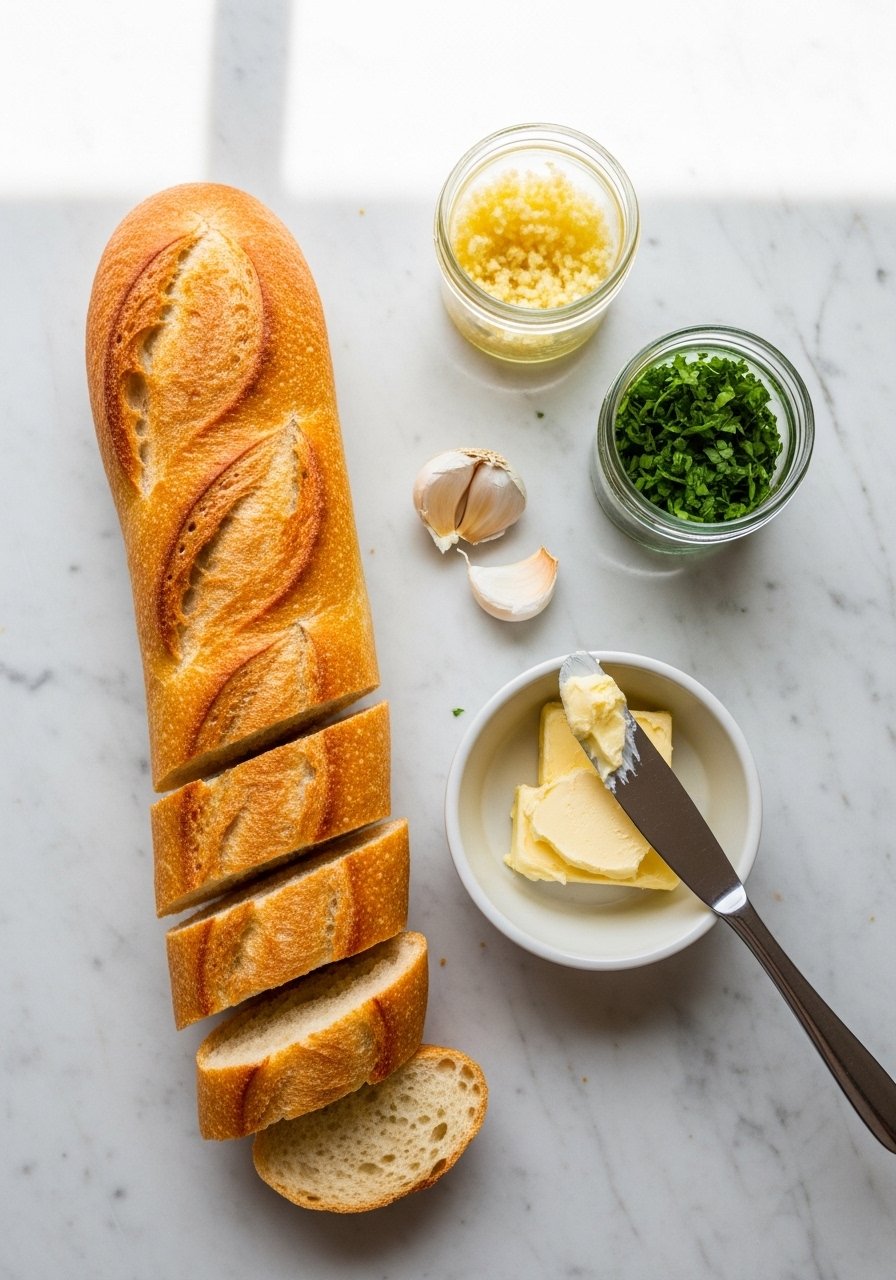
Start simple. For 4 servings, slice a baguette into 8–10 diagonal pieces, about 1-inch thick. Mix 4 tablespoons softened butter, 2 cloves minced garlic, 1 tablespoon chopped parsley, and a pinch of salt.
- Mince garlic with a garlic press for a quick, even paste.
- Use a small butter dish or bowl to keep your butter manageable.
- If you want herb oil, swap half the butter for 1 tablespoon olive oil.
Tip: Let the butter come to room temperature so it spreads easily without tearing the bread.
Mastering the Stovetop Skillet Technique
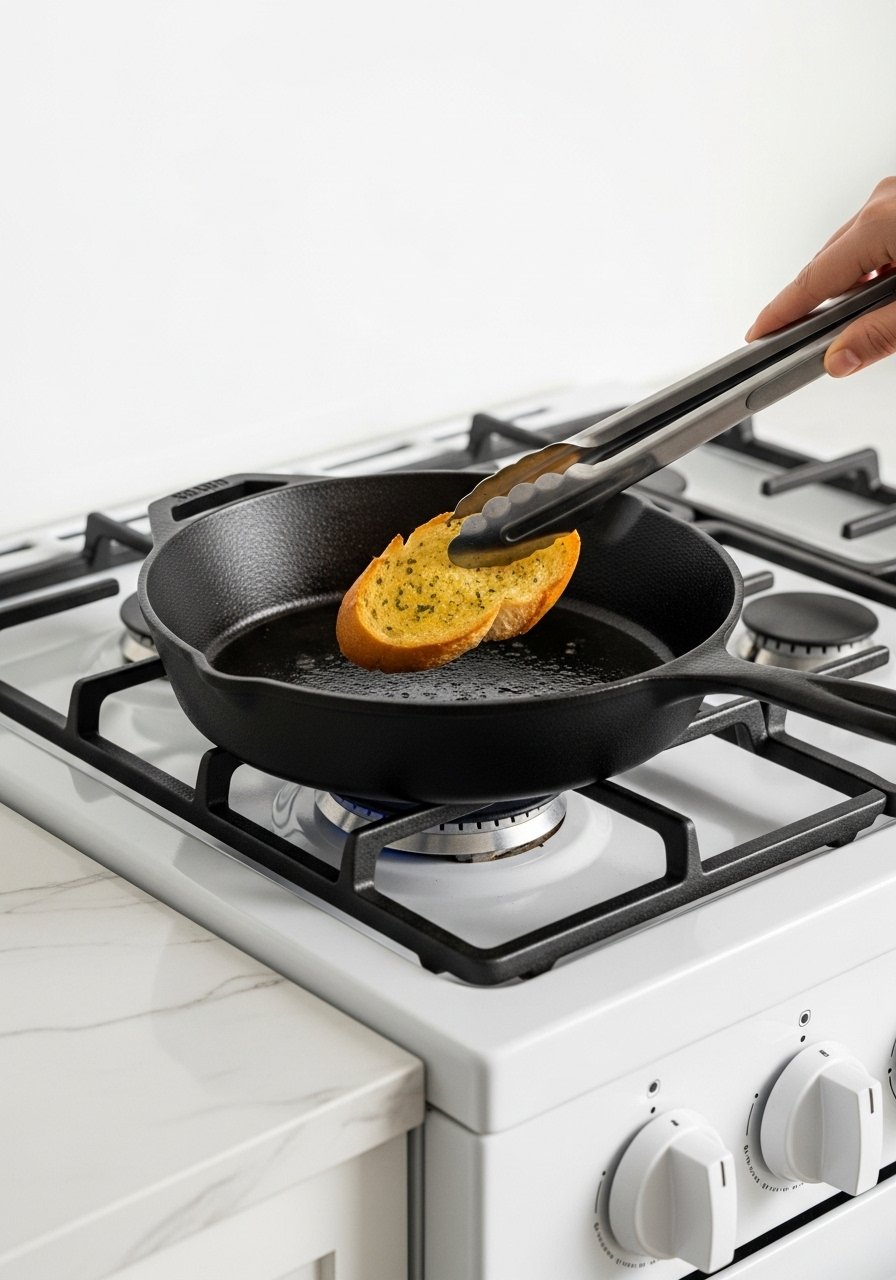
Heat your pan over medium heat for 2–3 minutes until hot but not smoking. Add a small drizzle of oil or 1/2 tablespoon butter to the pan. Place slices buttered-side down first.
- Cook buttered-side down for 2–3 minutes until golden.
- Flip and press lightly with a silicone spatula or spatula.
- Cook the other side 1–2 minutes to set the crumb without burning.
- Use a cast iron skillet for more even browning and a crisp crust.
- For delicate breads, use a non-stick skillet to prevent tearing.
Warning: If the pan is too hot the garlic will scorch. Lower heat slightly if you see dark specks.
Getting a Perfectly Crispy Result and Troubleshooting
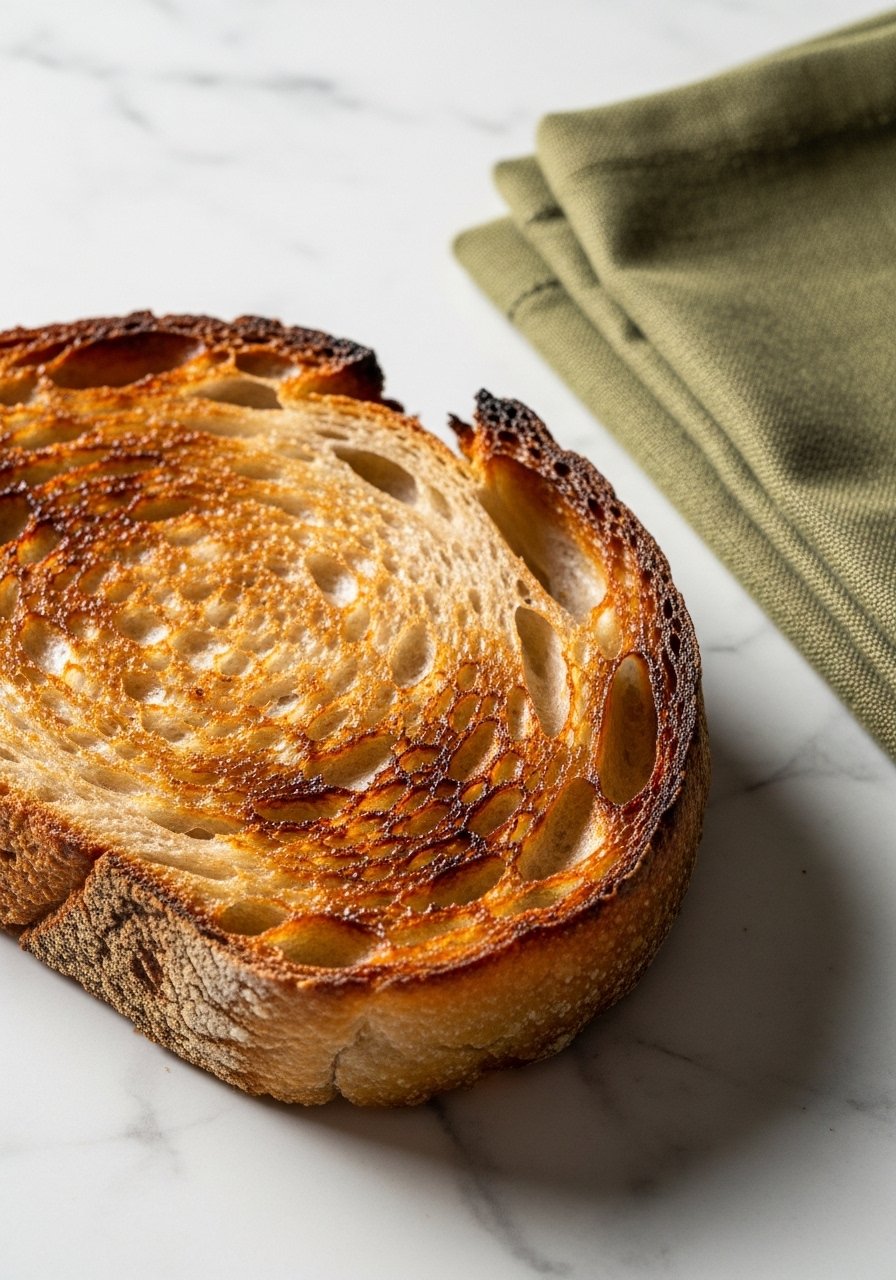
Crispiness comes from direct contact and quick moisture control.
- After toasting, set slices on a wire cooling rack for 1–2 minutes so steam escapes and bottoms stay crisp.
- If slices feel soggy, return to the pan for 30–60 seconds on each side on medium-low heat.
- For extra crunch, sprinkle 1–2 tablespoons grated Parmesan before the final flip.
Common issues:
- Bread soggy? Use less butter or toast a touch longer.
- Garlic bitter? Reduce heat and stir garlic into butter off-heat before spreading.
Finishing Touches, Serving, and Storage (Meal Prep Friendly)
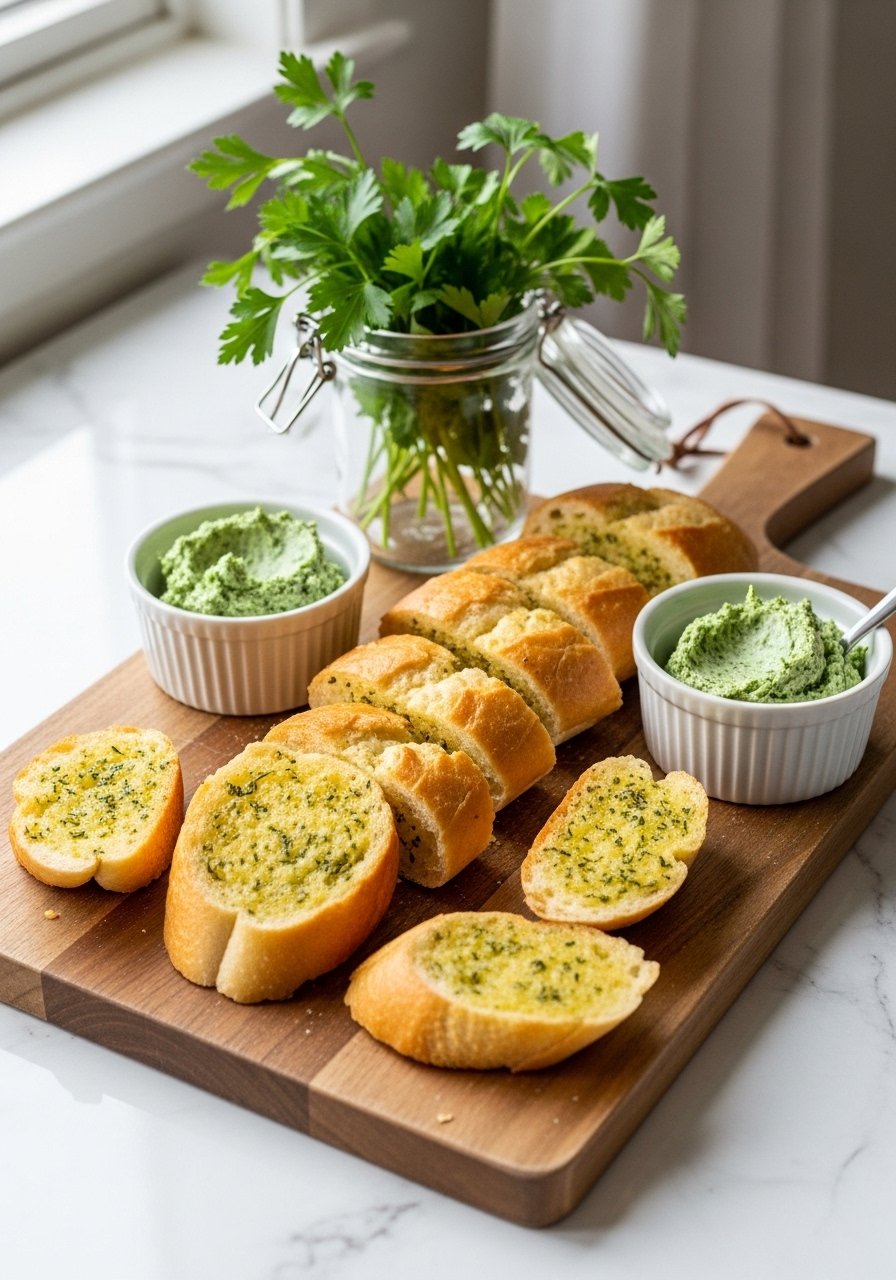
Serve immediately with a sprinkle of flaky sea salt and chopped parsley. For a shareable platter, stack on a wooden board and add marinara.
- Save leftovers in airtight glass containers in the fridge up to 2 days.
- Recrisp in a skillet for 1–2 minutes per side or toast under a broiler if available.
Make-ahead tip: Mix garlic butter and store in small glass jars for a week. Spread from chilled butter and toast slightly longer.
Variations:
- Add shredded mozzarella and cover the pan briefly to melt.
- Use garlic oil and sprinkle red pepper flakes for heat.
Once you get the hang of stovetop timing, this method makes perfect garlic bread without an oven every time. Save this guide, pin it for later, and try the crisping trick with a 10-inch cast iron skillet if you want reliably deep golden crust. Which flavor tweak will you try first? Pin this for your next weeknight dinner and share with friends who refuse to wait for an oven.