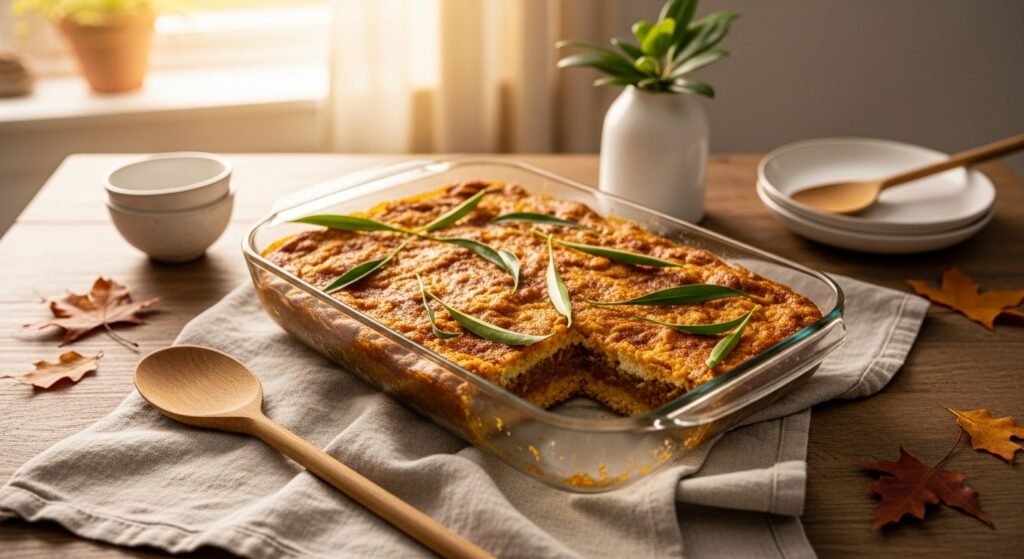
You want an easy, spiced dessert that looks like you spent hours in the kitchen. This pumpkin dump cake is buttery, warmly spiced, and perfect for fall entertaining. The prep takes about 10 minutes, and the oven does the heavy lifting.
The secret? A sturdy 9×13 glass baking dish for even baking and a flexible silicone spatula to spread the pumpkin layer smoothly. With those two simple tools you'll get consistent results every time.
Read on and you'll learn how to prep quickly, assemble for great texture, bake to golden perfection, and store leftovers the smart way. This guide includes easy swaps and time-saving tips for stress-free fall entertaining.
Preparing Your Ingredients (fast, no-fuss prep)
Start by gathering everything so you don’t overmix or second-guess measurements. This recipe serves 8–12 from a single 9×13 dish.
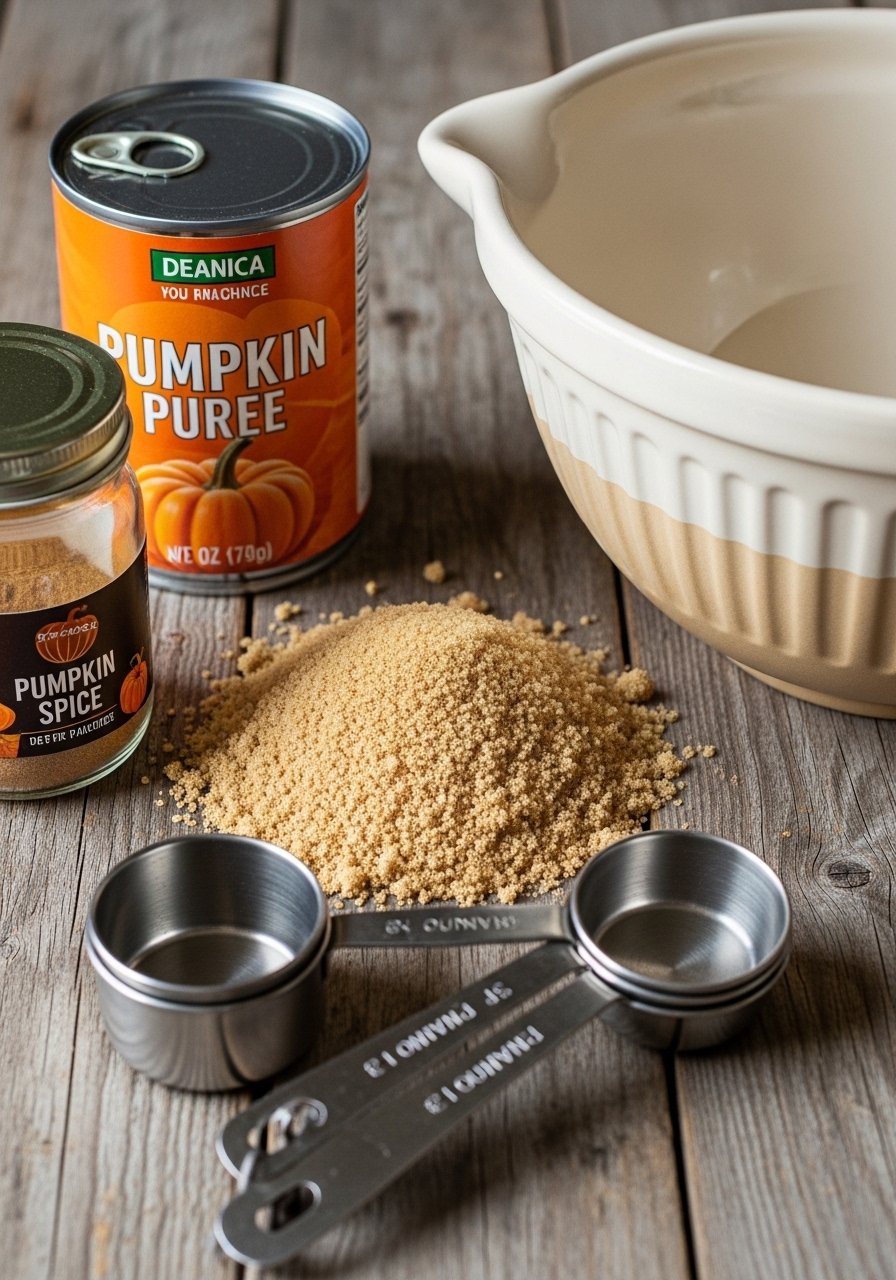
- Ingredients at a glance: 2 cans (15 oz each) pumpkin puree, 1 cup brown sugar, 2 tsp pumpkin pie spice, 1/2 tsp salt, 1 box (15.25 oz) yellow cake mix, and 1 cup (2 sticks) cold butter cut into slices.
- Use a reliable measuring cup set for quick, accurate scoops.
- Whisk the pumpkin, sugar, spice, and salt in a medium bowl. A stainless mixing bowl set keeps your station tidy.
Tip: Make your spice blend ahead and store it in small glass jars so the flavor is ready each fall.
The Dump Cake Assembly (easy, one-bowl steps)
This is truly a dump-and-bake dessert—no creaming or fancy folding.
- Preheat oven to 350°F. Grease the dish lightly with butter or nonstick spray.
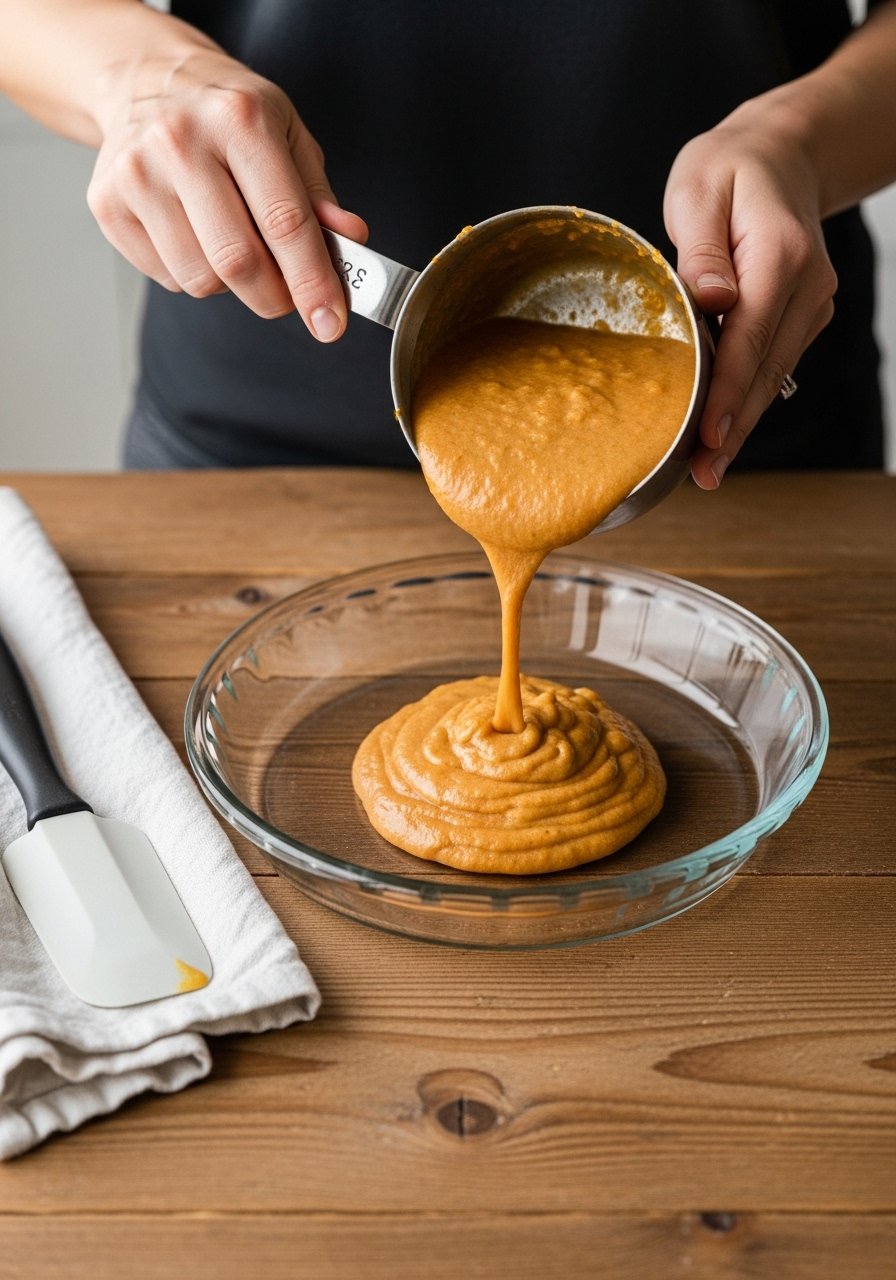
- Spread the pumpkin mixture evenly into the bottom of the 9×13 baking dish.
- Sprinkle the entire box of yellow cake mix evenly over the pumpkin—don’t stir.
- Distribute 1 cup of brown sugar or dotted butter slices on top for extra caramel pockets.
- Dot with sliced cold butter so it melts into the dry mix as it bakes.
- Use a parchment paper roll under the dish for easier cleanup.
- An offset spatula helps smooth edges without breaking the cake top.
Pro tip: If you want a crunch, sprinkle 1 cup chopped pecans before baking.
Baking, Timing, and Getting the Perfect Texture
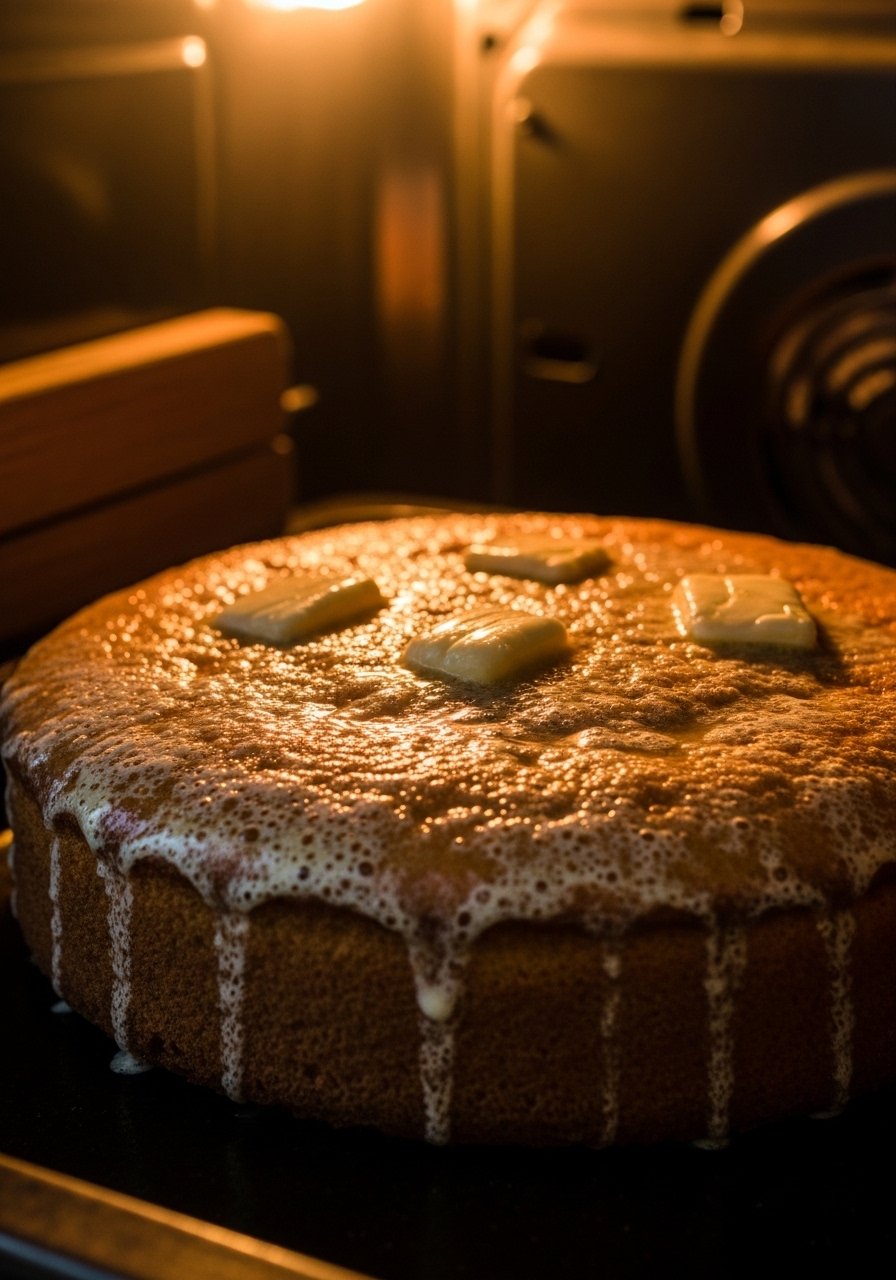
Bake for 35–45 minutes, or until the top is golden and bubbling at the edges. A fully set center should not be runny.
- Start checking at 35 minutes. If the top browns too quickly, tent with foil.
- For an exact check, insert an instant-read thermometer into the center—aim for about 195°F for set custard-like filling.
- After baking, rest 15 minutes so the pumpkin sets and slices cleanly.
Avoid overbaking; a slightly soft center gives you that creamy pumpkin texture. A wire cooling rack cools the dish evenly and prevents soggy bottoms.
Finishing Touches, Serving, and Storage (make-ahead friendly)
Serve warm with whipped cream or vanilla ice cream. For a party, transfer slices to a shallow serving tray and keep warm in a low oven.
- Store leftovers covered in the refrigerator for 3–4 days in airtight glass containers.
- To freeze, portion into single servings and seal in freezer bags. Freeze up to 2 months.
- Reheat slices in the oven at 325°F for 10–12 minutes, or microwave for 45–60 seconds.
When serving, use a pie server to keep slices neat. Want a handheld option? Top mini ramekins with the same method for individual servings.
Warm, spiced, and butter-forward—this pumpkin dump cake is effortless and crowd-pleasing. Pin this guide for your next fall gathering and try the pecan topping for extra texture. Which shortcut will you try first?